git --versionSetting up Git
Git vs. GitHub
Git is a distributed version control system that allows developers to track changes in their code, collaborate with others, and manage different versions of their projects. GitHub, on the other hand, is a web-based platform built around Git’s functionality, offering a place to host repositories, collaborate with others, and provide tools for code review, project management, and community interaction. While Git provides the underlying version control capabilities, GitHub enhances these capabilities with a user-friendly interface and additional features. Together, they are crucial for modern software development, fostering collaboration, ensuring code integrity, and enabling the open-source movement.
Installing up Git
For Mac:
Check Existing Installation: Since macOS might already have Git installed, open Terminal and type:
If Git is installed, this command will return the version number. If not, proceed to the next steps.
Install Homebrew (if not already installed): Homebrew is a package manager for macOS that makes it easy to install software. In Terminal, type:
/bin/bash -c "$(curl -fsSL https://raw.githubusercontent.com/Homebrew/install/HEAD/install.sh)"Install Git via Homebrew: After installing Homebrew, you can easily install Git with:
brew install git
Windows (PC)
For Windows (PC):
Download the Installer: Go to Git’s official website and download the Windows installer.
Run the Installer: Execute the downloaded
.exefile. This will open the installation wizard.Installation Settings: During installation, you’ll be presented with several options. For most users, the default settings will be adequate. However, you can customize them based on your preferences.
Finish the Installation: Click through the rest of the setup steps, and Git will be installed.
Open Git Bash or Command Prompt: Once installed, you can use Git Bash (a Git-specific command terminal) or the regular Command Prompt to use Git.
Setting up Git
RStudio
usethis and gitcreds are two powerful R packages that simplify the process of setting up and working with Git in RStudio, especially when it comes to handling GitHub token authentication.
Setting Up Git with RStudio using usethis and gitcreds:
Install and Load the Required Packages: First, you’ll want to ensure you have the necessary packages installed. You can do this from within R or RStudio:
if (!require(pacman))
  install.packages("pacman")

pacman::p_load(usethis, gitcreds)
Set Up Git (if you haven’t already): If you haven’t set up Git on your machine,
usethiscan help:Method 1 (in the Terminal)
git config --global user.name "Your Name"
git config --global user.email "youremail@example.com"
Method 2 (
usethis)usethis::use_git_config(user.name = "Your Name", user.email = "youremail@example.com")Authenticate with
usethisandgitcreds:usethiscan be used to create a GitHub token:usethis::create_github_token()This will take you to GitHub, where you then set the name of the token and set the expiration to No expiration:
Then scroll all the way down and say Generate token:

Copy the token, then paste it somewhere safe, you will never be able to view it again!
gitcredsis designed to work with credentials for multiple Git hosting services, but it can specifically help in getting and setting credentials for GitHub.gitcreds::gitcreds_set()This will prompt you to enter your personal access token. Remember, tokens are now used instead of passwords for HTTPS Git operations on GitHub.
Note: Another way to create a token:
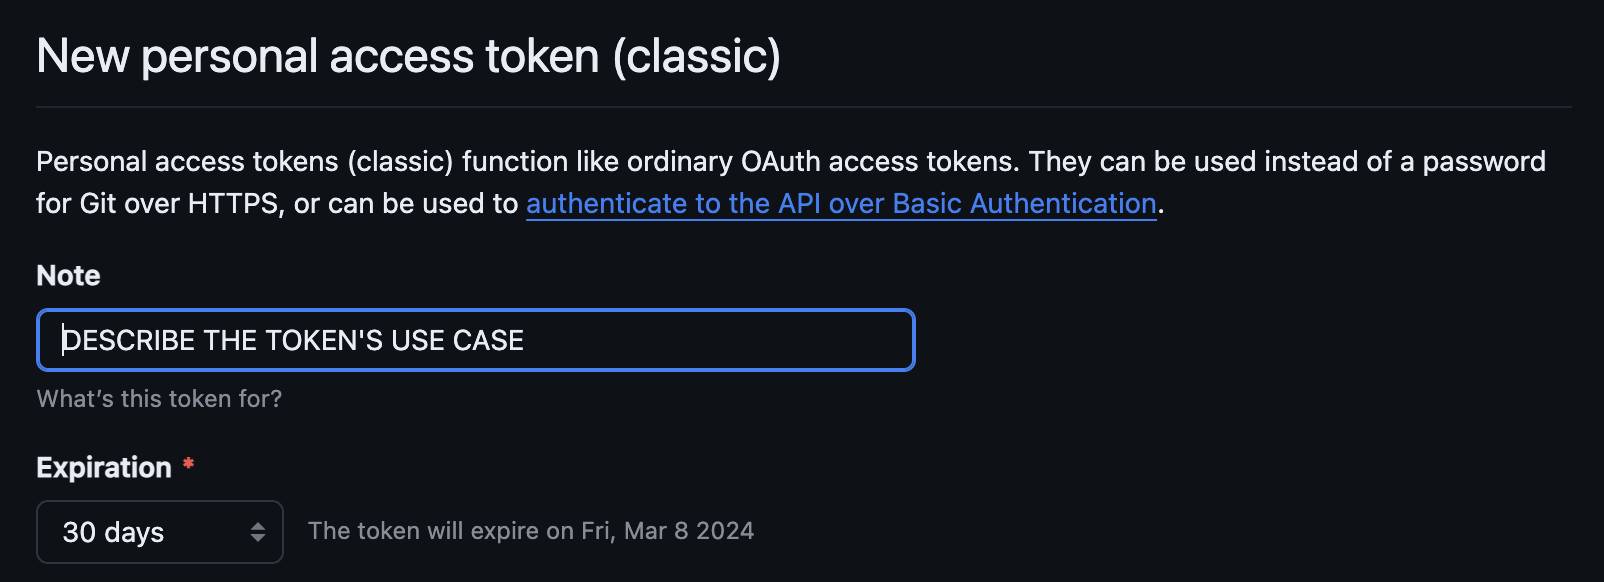
Go to your GitHub settings (click your profile picture in the top right > Settings).
In the left sidebar, click on
Developer settings.Click on
Personal access tokens, thenGenerate new token.Assign the necessary permissions/scopes to the token. For typical Git operations, you’ll need permissions like
repo,workflow, etc.Click
Generate token.Copy the generated token value for use with
gitcreds.
Subsequent Git Operations
For future Git operations (like push/pull) from within RStudio, your credentials are managed by
gitcreds, so you won’t need to re-enter them frequently.Handling Tokens in the Future: If you ever need to get, set, or forget your Git credentials, you can use:
gitcreds::gitcreds_get()   # to retrieve
gitcreds::gitcreds_set()   # to set/update
gitcreds::gitcreds_forget() # to forget/remove
VS Code
Setting Up Git Configurations in VS Code:
Open VS Code and ensure you have the
Gitextension installed. By default, VS Code comes with it.Set Git Configurations: In the terminal, set your email and name which will be used for commits:
git config --global user.name "Your Name"
git config --global user.email "youremail@example.com"
Setting Up Token-Based Authentication in VS Code for GitHub:
Generate a New Token on GitHub:
Go to your GitHub settings (click your profile picture in the top right > Settings).
In the left sidebar, click on
Developer settings.Click on
Personal access tokens, thenGenerate new token.Give your token a name, set the necessary scopes (permissions). For typical Git operations, you’ll need repo, workflow, and write:packages, read:packages, delete:packages (for package management), and user (for account details).
Click
Generate tokenat the bottom.
Copy the Generated Token: Once generated, you’ll see the token value. Make sure to copy the token now as you won’t be able to view it again.
Use Token in VS Code: When you push or pull from a GitHub repository, VS Code will prompt for authentication. Instead of your GitHub password, you’ll provide the token you just generated.
If you previously saved your credentials and VS Code isn’t prompting for authentication, you might need to update or remove your old credentials.
For Mac: If you’re on a Mac and had previously saved your credentials in the Keychain, you can update them:
Open
Keychain Access, which you can find with Spotlight.In Keychain Access, search for
github.com.Find the internet password entry for
github.comand edit or delete it.The next time you push/pull from VS Code, you’ll be prompted for your username and the new token.
For Windows: If you’re on Windows and had previously saved your credentials:
Go to the Control Panel > User Accounts > Credential Manager > Windows Credentials.
Find the credentials related to GitHub and edit or remove them.
The next time you push/pull from VS Code, you’ll be prompted for your username and the new token.